

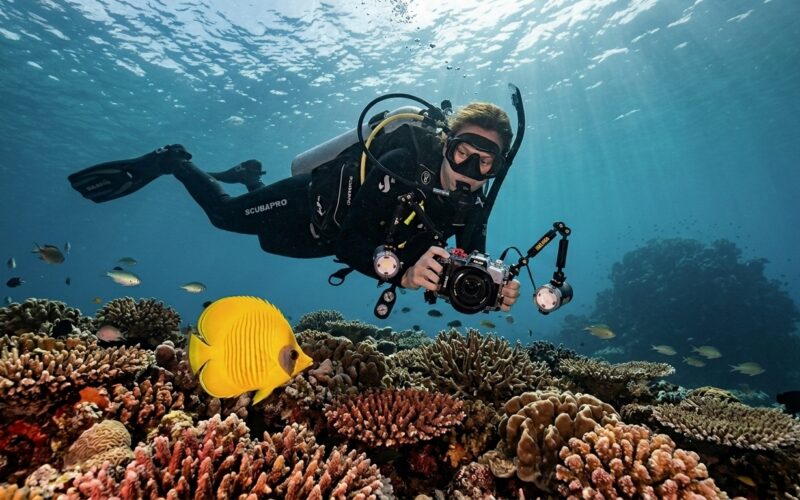
The first time you try to photograph a reef, something strange happens. The colors you remember from the dive look washed out on your screen. The fish that seemed close are tiny dots. The shot you framed so carefully is blurry because you drifted an inch too far. This beginner’s guide to underwater photography is written for that exact moment, when you know the ocean is beautiful but your photography skills have not caught up yet.
You do not need a five thousand dollar rig to make images you love. You need the right basic gear, a handful of settings you actually understand, and the diving skills to hold yourself still while you shoot. We will walk through all of it, in the order that matters.
Let’s take a look at how to build your setup, dial in your camera, and start bringing home shots that feel like the dive you remember.
Understanding Why Underwater Photography Is Different
Water is not air. That sounds obvious, but it changes almost everything about how a camera behaves. Light bends as it passes through your housing port, so subjects look about 25 percent closer and larger than they really are. Colors disappear with depth, starting with red at around three to five meters, then orange, then yellow. By 20 meters, everything looks blue and green unless you add light back into the scene.
Water is also full of particles. Even in clear tropical seas, there is plankton, sand, and drifting debris between you and your subject. The further away you shoot, the more of that stuff sits in the frame, softening detail and killing contrast. The single most important rule in underwater imaging is simple: get closer, then get closer again.
Once you internalize those two ideas, distance kills color and detail, and light must be added back, most of your gear and settings decisions start to make sense on their own.
Choosing Your First Underwater Camera
There is no single right camera for a beginner. There is only the camera you will actually take diving and learn on. Here are the main paths people take.
Action Cameras
A GoPro or similar action camera is the most common entry point, and for good reason. It is small, rugged, waterproof to recreational depths in its native housing, and shoots wide, immersive video. For wide reef scenes, big animals, and dive memories, it is hard to beat for the price.
The trade-off is control. You cannot change lenses, the sensor is small, and the ultra-wide field of view means small subjects like nudibranchs look like specks. Add a red filter for blue water above about ten meters, or a small video light for anything closer.
Compact Cameras in Housings
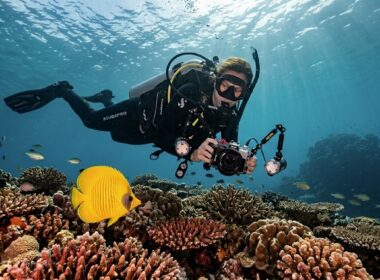
A compact camera such as the Olympus TG series, paired with a dedicated polycarbonate housing, is the sweet spot for many beginners who want real photos. You get manual controls, RAW files, macro modes that focus centimeters from the lens, and the ability to add wet lenses and strobes later. Housings for these cameras are relatively affordable and easy to travel with.
Mirrorless and DSLR Systems
A mirrorless or DSLR system in an aluminum housing gives you the best image quality and the most creative control, but it is a serious investment. A full rig with housing, ports, strobes, arms, and lenses can cost more than the camera itself several times over. If you are certain underwater photography is going to be a long-term passion, this path pays off. If you are still figuring it out, start smaller and grow into it.
Smartphones in Dive Housings
Purpose-built smartphone housings are getting genuinely good. If you already own a capable phone and dive shallow reefs on holiday, this can be a low-cost, low-hassle way to start. Just make sure the housing is rated for your intended depth and vacuum-tested before every dive.
Housings, Ports, and What Actually Keeps Water Out
Your housing is the most important piece of gear you own, because a single failure ends your camera’s life. A few principles are worth knowing before you buy.
- Match the housing to the exact camera model. Even minor camera revisions can shift button positions.
- Check the depth rating. Most recreational housings are rated to 40 or 60 meters, which covers standard recreational diving with margin.
- Learn how to service the O-rings. Clean them, inspect them for hair and grit, and lubricate them with the manufacturer’s silicone grease, nothing else.
- Do a soak test in a rinse tank or bathtub before every trip.
Ports are the clear windows in front of your lens. Flat ports work for macro. Dome ports are used for wide-angle lenses because they correct the magnification effect of water and allow you to shoot split shots. You do not need to worry about this on day one, but it becomes relevant the moment you move to interchangeable lens systems.
Lighting: The Real Secret
If you take one thing from this guide, take this. Underwater photography is really an exercise in putting light back into a world that steals it. Ambient sunlight alone gives you blue images. Adding light gives you color, contrast, and life.
Video Lights
A continuous video light is the simplest starting point. You can see exactly what it illuminates in real time, which is enormously helpful when you are learning. Look for something in the 1500 to 3000 lumen range with a wide, even beam. Video lights work for both video and stills, and they double as a backup dive light. If you also enjoy diving after dark, they pair well with the techniques we cover in our guide to safe and stress-free night diving.
Strobes
Strobes, also called underwater flashes, deliver a short burst of powerful light that freezes motion and restores full color. They are more expensive and take more practice to position correctly, but they produce the images you see in magazines. Most photographers eventually end up with two strobes on flexible arms, angled outward to light the subject without lighting up the particles directly in front of the lens.
Red Filters
For ambient light shooters in blue water, a screw-on or slide-in red filter restores warm tones between roughly five and 20 meters. Above five meters there is still too much red in the water. Below 20 meters there is not enough light left for the filter to compensate. In green water, use a magenta filter instead.
Camera Settings for Beginners
Auto mode will let you down underwater more often than not. The camera does not know that the water is stealing red, or that your subject is a tiny shrimp against a bright sand background. You do not need to master full manual on day one, but you should understand what each setting does.
Shoot RAW When You Can
RAW files preserve all the sensor data, which means you can rescue color and exposure in post-processing. This matters more underwater than almost anywhere else, because white balance is so often off.
White Balance
If you are shooting ambient light video with a compact or action camera, use the underwater or custom white balance mode. Recalibrate every few meters of depth change by pointing at something neutral, such as your slate or a patch of sand. For stills in RAW, you can correct white balance later, but nailing it in-camera saves hours.
Aperture, Shutter, and ISO
Here is a simple starting framework for reef stills with strobes.
- Aperture around f/8 for a balance of sharpness and depth of field. Go wider open for low light, stop down further for macro.
- Shutter speed around 1/125 to 1/200 to freeze subject motion and control the amount of blue background light.
- ISO 200 to 400. Push higher only when you must, since noise gets ugly quickly in shadow areas.
Faster shutter speeds darken the blue water background. Slower speeds brighten it. Aperture controls how much of your strobe light hits the sensor. Once you understand that triangle, you can adjust intentionally rather than by guesswork.
Focus
Use single-point autofocus and place the point on the subject’s eye whenever possible. For skittish fish, a small burst of continuous focus can help. For macro, many photographers lock focus and then rock gently forward and back to fine-tune, since manual focus rings are hard to reach through a housing.
Composition Underwater
Great gear cannot save a boring composition. A few habits will lift your images immediately.
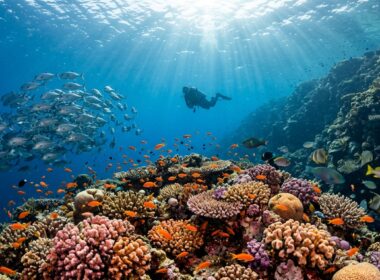
- Shoot slightly upward. Backgrounds of blue water or sun rays are almost always more flattering than sand or rubble.
- Get eye level with your subject. Shooting down at a fish flattens it and disconnects the viewer.
- Fill the frame. If a subject is small in your viewfinder, it will be tiny on your screen at home.
- Leave space in the direction the subject is looking or moving.
- Watch your edges. A stray fin tip or dangling gauge ruins otherwise great shots.
Wide-angle work rewards patience and closeness. Macro rewards stillness and precision. Both reward the same underlying skill: knowing exactly where your body is in the water.
Buoyancy Is a Photography Skill
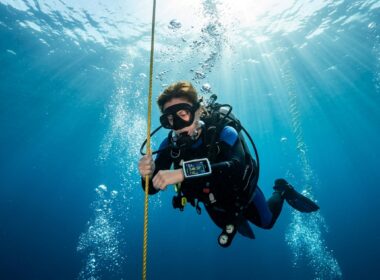
You cannot separate underwater photography from diving technique. A photographer who hovers motionless with neutral trim will out-shoot a technically gifted one who bumps the reef every thirty seconds. Perfect your hover before you invest in strobes. Breathe slowly and evenly, keep your fins still, and let tiny lung adjustments carry you toward the subject rather than kicking.
If you want to go deeper on this, our piece on the importance of good buoyancy lays out drills that translate directly into steadier images and less damage to the reef around you.
Speaking of the reef, never brace on living coral to steady a shot. Beyond the environmental damage, contact injuries can end a trip quickly, as our post on coral injuries explains. Use a single gloved fingertip on bare rock or sand if you truly need to stabilize, and only where local rules allow.
Approaching Marine Life
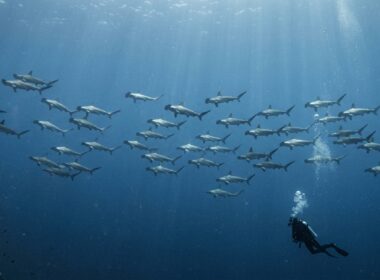
Animals decide how close you get, not you. Approach slowly, at an angle, breathing softly. Never chase, corner, or touch. Big animals like sharks and rays often circle back if you stay calm and low. Small critters like frogfish and nudibranchs will hold still for as long as you are respectful.
Keep your strobes at reasonable power. Blasting a nocturnal shrimp with full-power flash at close range is stressful for the animal and rarely produces a better image. On night dives especially, red or dimmed focus lights are kinder and more effective.
Packing and Traveling With a Camera Rig
Traveling with camera gear is where a lot of beginners get caught out. Housings are fragile, strobes contain batteries with airline restrictions, and dive destinations are often remote. A few habits save trips.
- Carry your camera, housing, ports, and strobes in your cabin bag. Never check them.
- Remove batteries from strobes and lights during flights and store them in approved cases.
- Bring spare O-rings, silicone grease, lens cloths, and a small blower for dust.
- Pack a soft dry towel dedicated to drying your housing before opening it between dives.
- Rinse everything in fresh water at the end of every dive day, and operate every button under water while rinsing.
For a broader view of what to bring on a dive trip, our essential diver packing list is a good companion to this article.
Because camera equipment often costs more than the rest of your dive kit combined, it is worth thinking about how it is protected while you travel. Our dive and travel membership is built specifically for divers, and we understand that a lost bag or a flooded housing is not just an inconvenience, it is a lost trip. Traveling with that safety net in place means you can focus on shooting rather than worrying about what happens if a flight is delayed or a strobe goes overboard.
Caring for Your Gear
Underwater camera equipment lives a hard life. Salt, sand, sunscreen, and pressure changes all conspire against it. A short routine after every dive extends the life of every piece significantly.
- Soak the housing in fresh water for at least 15 minutes, cycling each button.
- Dry the exterior fully before opening. Water on the top of the housing runs straight into your camera the moment you crack the seal.
- Inspect O-rings before every dive day. Replace any that show flat spots, nicks, or dryness.
- Store the housing with the main O-ring removed or with the latches undone to preserve the seal’s shape.
Our broader tips for maintaining dive gear apply to camera rigs too, especially the discipline of rinsing everything the same way, every time.
Post-Dive Workflow
The dive is only half the process. What you do on the boat and back at the room matters just as much.
Offload your cards to two separate drives before deleting anything. Cull ruthlessly and keep only the frames you would happily show someone. In editing, start with white balance and exposure, then lift shadows gently, add a touch of clarity for texture, and pull back magenta or cyan casts as needed. Resist the temptation to over-saturate. Real reefs are colorful, but they are not neon.
Keep a simple log of what worked. Which settings produced clean shark shots at Bimini? Which strobe angle killed the backscatter on that muck dive? Beginners who journal their settings progress faster than those who do not.
Packing Tips and Pro Tips
A few extras that beginners rarely hear until they have already made the mistake.
- Number your O-rings and rotate them. A tired ring on a deep dive is not worth the fifty cents you saved.
- Bring a small microfiber and a rocket blower for the inside of your port. Dust specks on the port glass look like sea monsters in your final image.
- Always do a bubble check at three meters before descending further. If you see a bubble stream from the housing, abort and inspect at the surface.
- Do not zoom past the optical limit of your lens. Digital zoom underwater is almost always worse than cropping later.
- Learn one strobe position well before you learn ten. Wide and slightly behind the port, angled outward, solves most problems.
- Shoot more than you think you need. Storage is cheap. The dive is not.
Conclusion
Underwater photography rewards patience more than gear. The divers who bring home extraordinary images are usually the ones who spent their first year mastering buoyancy, learning one camera deeply, and getting closer to their subjects than they thought polite. Buy the smallest setup you will genuinely use, protect it well, and give yourself permission to make bad photos on the way to good ones. The ocean is patient. Your images will catch up.
Need coverage for your upcoming trip? Get covered here.
Happy diving, and may your next adventure be your best one yet!
Summary
This beginner’s guide to underwater photography walks you through choosing a camera and housing, understanding lighting and white balance, dialing in manual settings, mastering buoyancy for stable shots, and building a simple post-dive workflow. Start with a compact camera or action cam in a rated housing, add a red filter or video light, shoot close and slightly upward, and practice buoyancy before worrying about gear upgrades. At DiveAssure, we help divers protect their trips and equipment so they can focus on capturing the ocean.